Painting your own tennis or pickleball court? Applying Acrylic Resurfacer correctly is one of the most important steps in building a smooth, durable playing surface, and getting the technique right makes the difference between a professional-looking finish and a patchy one.
Here's a full breakdown of what you'll need and how to apply it, paired with our video walkthrough: Watch the full tutorial on YouTube.

What You'll Need
Materials:
-
Acrylic Resurfacer (available as concentrate or factory-textured)
-
Silica sand (only needed if using concentrate)
-
Clean, potable water
Tools:
-
Mixing drill and buckets
-
Clean, empty drums
-
Rubber squeegee
-
Wheelbarrow
-
Flat shovel
Mixing Acrylic Resurfacer
Acrylic Resurfacer is available in two forms: concentrate, which requires you to add silica sand and water yourself, or factory-textured, which only needs water added. Which one makes sense for your project often comes down to project size and how easily you can access the manufacturer's recommended silica sand, since each option has its own benefits.
If you're using concentrated Acrylic Resurfacer, you may need to divide the material into clean, empty drums or buckets to give yourself enough room to mix properly.
To mix it correctly:
-
Thoroughly mix the Acrylic Resurfacer with the specified amount of water before adding any silica sand
-
Add the silica sand slowly while continuously mixing, to keep the blend consistent and prevent clumping
-
Always follow the manufacturer's Technical Data Sheet for the exact water, sand, and mixing ratios
As a general guide, a standard tennis court may require 2 to 3 full drums of mixed Acrylic Resurfacer per coat. More porous court surfaces may need additional material to achieve proper coverage.

Application Tips & Techniques
Once your material is mixed, technique matters just as much as the mix itself:
-
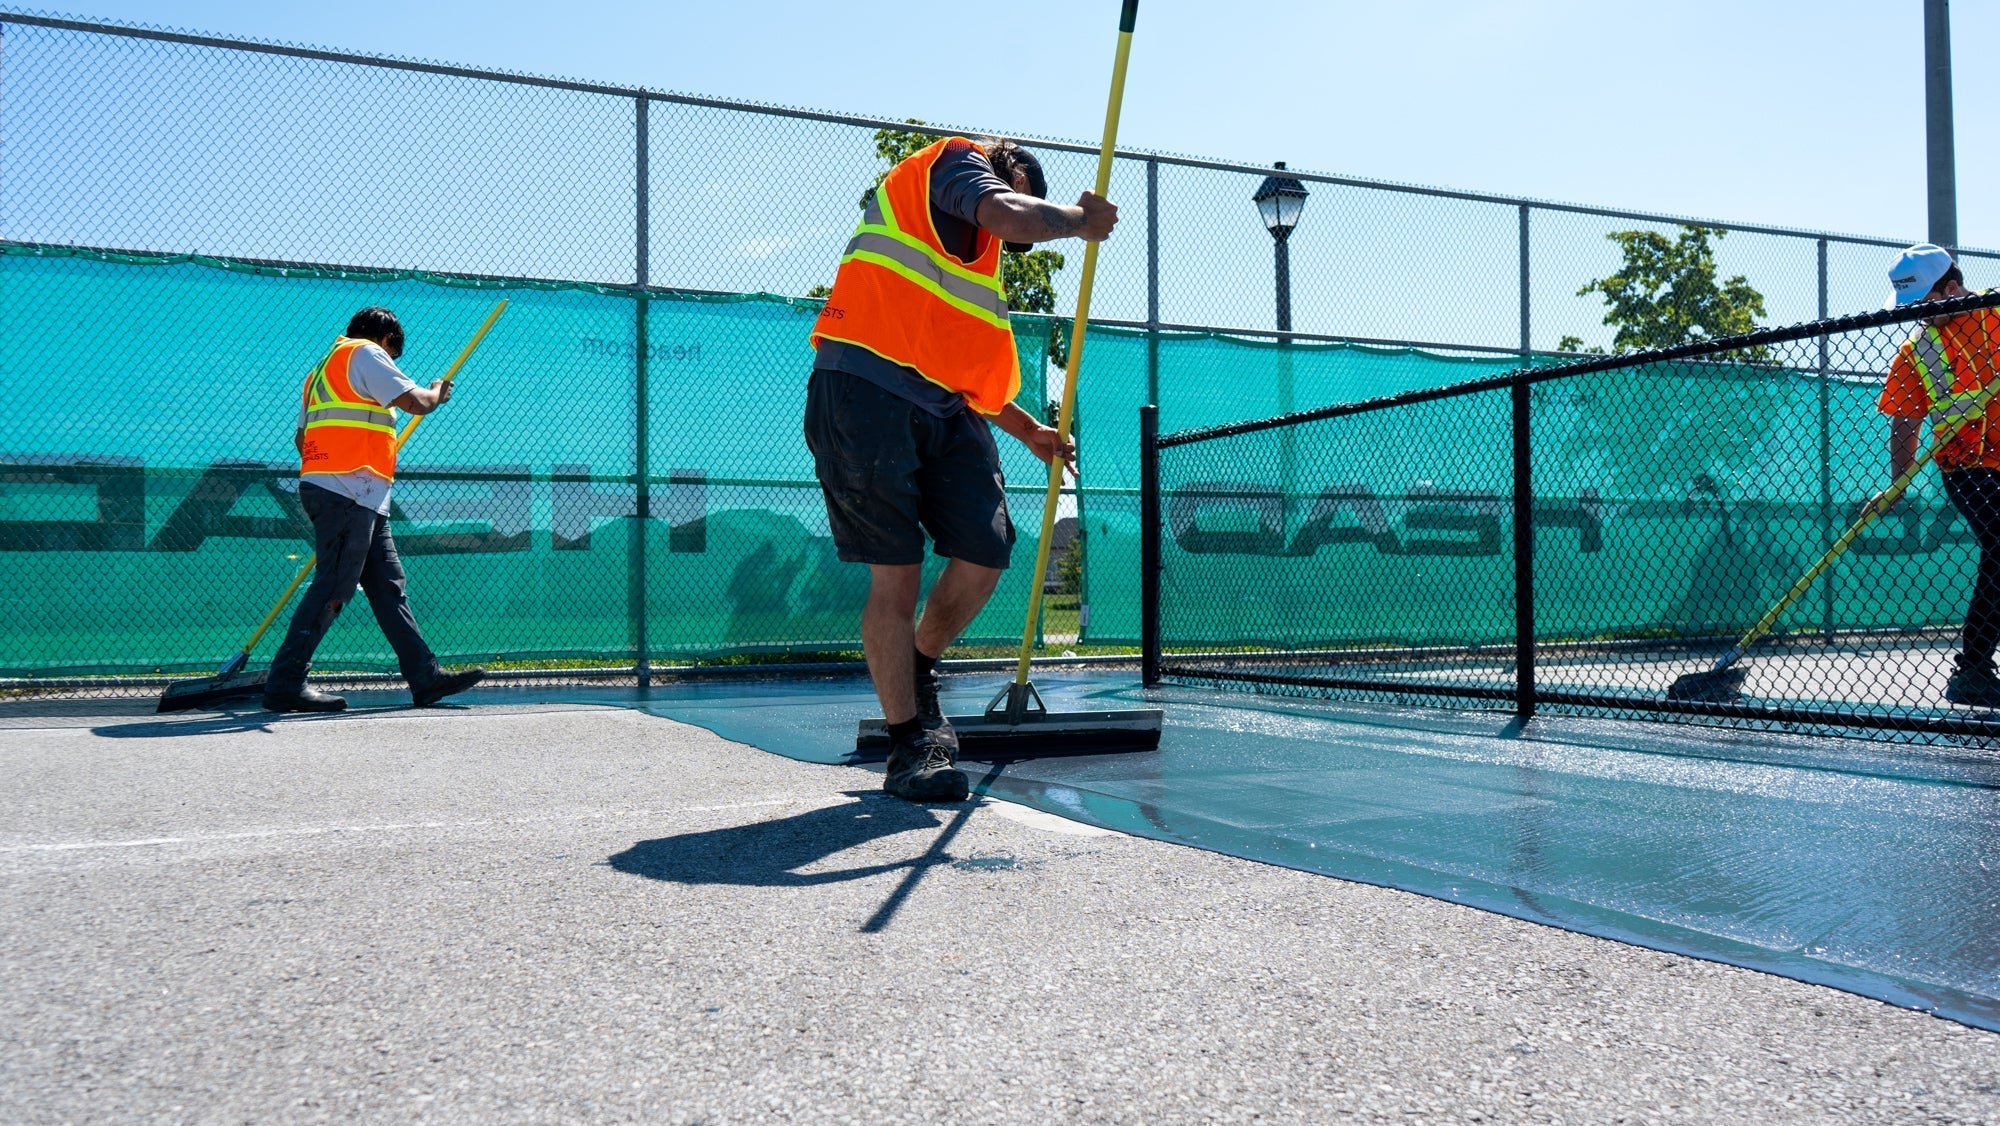
Maintain a continuous puddle of Acrylic Resurfacer below the squeegee as you work your way down the court, pouring more where needed
-
Keep consistent pressure and squeegee angle throughout each pass
-
Focus on pulling the material down the court, rather than moving it side to side
-
Don't try to pull too much material at once. Slightly overlap your previous pass, find your rhythm, and keep moving
-
Watch for low spots, ridges, or beads of excess material, and smooth them out as you go
-
As you approach the final quarter of the court, switch to smaller pours as you prepare to change direction and close out the final area

Closing Out the Final Area
Finishing the last section of the court takes a bit of extra attention:
-
Depending on your access to the court, you may need to change direction to close out the application
-
Pull excess material from the original puddle to prevent buildup, especially important in hot weather when material sets up faster
-
Pour smaller amounts from a bucket as needed, rather than working from a large puddle
-
Use a flat shovel to remove any excess material
Final Thoughts
Applying Acrylic Resurfacer is a hands-on process, but with the right materials, tools, and technique, it's a project that a determined DIYer can take on. Mixing to the manufacturer's exact ratios and keeping a steady, consistent squeegee technique are what separate a smooth, even finish from a surface with visible low spots or ridges.
For the full step-by-step demonstration, watch our video walkthrough: How to Paint Acrylic Resurfacer.
DIY Court USA supplies Laykold Acrylic Resurfacer, Base Prep, and Colorcoat systems, along with the tools and resources to help homeowners, contractors, schools, parks, and recreation facilities apply a professional-quality court surface themselves.
Frequently Asked Questions
What's the difference between concentrate and factory-textured Acrylic Resurfacer? Concentrate requires you to add both water and silica sand yourself, while factory-textured only requires water. The right choice often depends on your project size and access to the manufacturer's recommended silica sand.
How much Acrylic Resurfacer do I need for a tennis court? A standard tennis court typically requires around 2 to 3 full drums of mixed Acrylic Resurfacer, though more porous surfaces may need additional material for proper coverage.
Can I apply Acrylic Resurfacer myself? Yes. With the right materials, tools, and attention to mixing ratios and squeegee technique, Acrylic Resurfacer is a project many DIYers can take on themselves.
What happens if I work too slowly in hot weather? Acrylic Resurfacer can set up faster in hot conditions, so it's important to pull excess material from the puddle regularly to prevent buildup and keep the surface even as you work.
Do I need special tools to apply Acrylic Resurfacer? The core tools are a mixing drill and buckets, clean empty drums, a rubber squeegee, a wheelbarrow, and a flat shovel, all fairly standard equipment for a resurfacing project.

Share:
How Artist Melissa Cole Brought Her Vision to Life on a Basketball Court
Sport Tiles 101: What They Are and Why They're Taking Over